Raw Vegan Salted Caramel Slices

img_3696img_3697

These Raw Vegan Salted Caramel Slices are heaven! Three layers made up of wholesome, refined sugar-free ingredients but absolutely no sacrifice on taste. The first layer is a soft oaty biscuit, the second is a rich date and tahini caramel and the third layer is dark homemade chocolate. These taste just like the caramel slices I used to buy at school only (in my opinion) better!

Ingredients

Biscuit Layer

100g Ground Almonds

100g Rolled Oats

2 tbsp Coconut Oil

1 tbsp Maple Syrup

Caramel Layer

200g Medjool Dates

1 tbsp Tahini

1 tbsp Coconut Oil

3 tbsp hot water

pinch of Salt

Chocolate Layer

100g Coconut Oil

60g Cocao Powder

4 tbsp Maple Syrup

1 tsp Vanilla Extract / powder

pinch of salt

– Using a food processor blend all of the biscuit ingredients together. Transfer to a lined 8inch square tin, pressing down the mixture evening so that it is compact. Place in the fridge to set while you make the caramel.

– Pit the dates and then whizz them up in the food processor until finely chopped. Add the rest of the ingredients and continue to process until a smooth caramel is formed. It should be thick but spreadable. Evenly spread the caramel over the biscuit layer and place back in the fridge while you make the chocolate.

– Melt the coconut oil in the microwave and then add the rest of the chocolate ingredients, mixing thoroughly. Pour over the caramel layer, tap the tin a few times off the bench to evenly spread and burst any air pockets. Refrigerate for at least 30 minutes or until the top layer has compete set and you are able to slice.

Enjoy!! X

Nutty Chocolate Breakfast Bars 

Sweet, nutty, chocolatey, chewy…oh boy, these are good! These breakfast bars are great for when you are on the move, you can just pop them in your bag and eat them on your way to work if need be! They are delicious, filling and nutritious and the best thing is that you can experiment with what fruit and nuts you include. There’s no exact science with this, that’s why I just throw in the fruit and nuts as I please – you can find the combination and quantities that work best for you!

Ingredients – makes up to 8 bars

150g oats

5 neglet dates, chopped

Handful of almonds, chopped

Handful of raisins

Handful of pumpkin seeds

3 tbsp peanut butter

3 tbsp maple syrup

1 tbsp coconut oil

1 flax egg (1 tbsp ground flax mixed with 3 tbsp water)

1 tbsp cocoa powder

Simply put all of the dry ingredients in a large bowl. Melt the coconut oil and add this along with the maple syrup, peanut butter and flax egg to the mixture. Combine well and then transfer to a lined 20cm tin. Press down the mixture tightly, making sure the sides have defined edges. You might doubt whether the mixture will set at this point but when the coconut oil solidifies in the fridge the bars will hold there shape perfectly. Put in the fridge for at least 2 hours before cutting into bars.

Enjoy!

Bulgar Wheat Lunch Recipe

image

I have been loving bulgar wheat lately so I thought I would come up a recipe which is healthy, satisfying and is great served cold – making it is perfect thing to take to work for lunch.

Ingredients

300g bulgar wheat

1 tin of sweetcorn

1 tin of chickpeas, rinsed

1 red pepper, finely chopped

3 cloves garlic

1 tsp chilli flakes

handful of basil

1 tsp cumin

1 tsp onion powder

olive oil

Salt and pepper

[Makes 6 portions and lasts around 3 days refrigerated in an air tight container]

– Put the bulgar wheat in a pan and cover with hot water, a good few inches above the level of the bulgar wheat. Once this has come to a boil, put the lid on and reduce to a simmer for 10-15 minutes until cooked.

– Meanwhile sauté 2 cloves of garlic in olive oil until fragrant, finely chop the remaining glove of garlic and then add all of the garlic to the rest of the ingredients in a bowl.

– Once the bulgar wheat is cooked drain and mix everything together.

This is such a filling, satisfying and versatile recipe. I know I will be experimenting with some different flavour combinations in the next few weeks! Hope you enjoy 🙂 x


Recipe. Taste. Repeat

So this week I wanted to share with you some of the meals / desserts i’ve been loving lately. I’m making these things over and over again because 1) they are delicious 2) easy to make – win win!

First up – the pizza. Well me and Chris have dabbled in a bit of fake cheese in the past but to be honest, I wasn’t feeling it. I’d much prefer to make something different than try and replicate with a poor substitute. So I came up with a ‘recipe’ for a cheese free pizza, I use the word recipe loosely as I used a store bought pizza base mix (you just add water) ha! I added chilli tomato paste, nutritional yeast, onions, sundried tomatoes, lots of chopped garlic and then drizzled cheese-free pesto mixed with extra olive oil all over the pizza. I then put it in the oven on 180 degrees for about 10 minutes.

I find that the extra oil keeps the pizza moist and indulgent – standing in for the cheese. I can honestly say, hand on heart that we didn’t miss the cheese one bit. The pizza was absolutely delicious and went well halved with some home made chips! Well, it was Saturday 😉

image

Deliciously Ella’s Chickpea, Quinoa and Turmeric Curry.

Oh this is very good, very good indeed. You can just throw everything in and within the hour you have a delicious and nutritious curry which will make six portions. We’ve been taking this to work for our lunch and I was surprised to see how well it reheats. It also keeps well in the fridge. Another bonus is that you don’t need to cook rice or cous cous in addition to this as it already has quinoa in. It’s an all round super curry, really.

image

Deliciously Ella’s Sweet Potato Brownies

When I first heard about these I wasn’t completely convinced they would be for me as I have love hate relationship with sweet potato but I gave them a go and today I’ve just made my third batch – so good! You forget that there is sweet potato in them but they add a moistness to the brownies. They are also very chocolatey, which is great. I would recommend buying a good quality cocao powder as it makes all the difference. For the second batch I made a chocolate frosting to go on the top which was amazing. For the frosting I used 1 tbsp cocao powder, 1 tbsp coconut oil, 2 tbsp of pure maple syrup and a pinch of Himalayan pink salt. Mix it all together and spread on the brownies once they have cooled, then pop in fridge to set. We’ve been taking these to work for breakfast as they give us loads of energy and fill us up until lunch. I think these will be a staple in our house for the months to come.

image

Sweet Potato Burgers

image

After visiting the Sky Apple Café last week I decided to try and recreate the Sweet Potato Burgers I had tried there as they were so delicious! It took a couple of attempts to get these right but I’m really happy with the way these turned out. The burgers are tasty and satisfying and are very easy to prepare and cook. This is a lovely light and summery meal to have on a weekday evening and only takes around 40 minutes to make, including prep and cooking time. Happy days! I hope you enjoy 🙂

To make 4 medium burgers…

  • 1 large sweet potato
  • 1/2 red onion chopped finely
  • 2 tsp cumin
  • 2 tbsp sweet corn
  • handful of panko breadcrumbs
  • handful of fresh coriander
  • salt and pepper
  1. Peel the sweet potato into even slices and put into the microwave for 10 minutes or until soft. NB: I boiled my sweet potato on the first attempt and found that the potatoes retained too much moisture, despite being drained, so the burgers did not hold their shape once cooked.
  2. Mash the potato up with a fork and mix through the rest of the ingredients until evening distributed.
  3. Line a baking tray with parchment paper, brush olive oil on the tray.
  4.  Mould out four evenly sized burgers and place them on the tray.
  5. Cook for 25 minutes in a 200 degree oven, flipping over half way through. Take out once crispy on the outside.

I served the burgers with kale which I had sautéed in salt and pepper, along with some avocado, sweet corn and a cashew nut dressing (recipe below). I also think these burgers would be great served in a bun with hot salsa and guacamole.

Cashew Nut Dressing

  • 1 cup of cashews, soaked
  • 1 garlic clove
  • 1 tsp mixed herbs
  • 1.5 tbsp apple cidar vinegar
  • 2 tbsp olive oil
  • 1 tbsp onion powder
  • black pepper
  • 1 cup of water (add slowly to desired consistency)
  1. Soak the cashew nuts in hot water for at least 15 minutes
  2. Put all of the ingredients, apart from the water, in a food processor and blend until smooth.
  3. Add cold water slowly until it reaches your desired consistency for salad dressing.


Banana Oat Cookies

I was feeling experimental and had some bananas that needed using up so I got to work on making some oaty cookies. I was hoping they would be a bit more pleasing on the eye but delighted to report that they taste pretty good! They are extremely filling and hearty due to the oats and nuts so would be great to have for breakfast or to have around 3pm to avoid a mid-afternoon slump. These cookies are dairy and refined sugar free and should last around 4 days in an airtight container in the fridge. I would recommend warming the cookies up in the microwave for 20 seconds as they are better served warm.

imageimage

Recipe

  • 2 cups of oats
  • 1 cup of mixed nuts (I used almonds and walnuts)
  • 3 bananas
  • 1 cup of ground almonds
  • 1/2 tsp cinnamon
  • 1/2 tsp all spice
  • 1/2 cup almond milk (I use Rude Health)
  • 1 tsp of fruit sugar
  • 2 tbsp cocao nibs (I use Sevenhills)

Leaving the cocao nibs to one side, put rest of the ingredients into a food processor until the mixture has become the consistency of cookie dough. My dough was a little wet at first so I added ground almonds. Lastly, mix the cacao nibs through the mixture with a spatula. The mixture will make 8 large cookies or 12 small. Put the cookies onto a tray with parchment paper and into a 180 degree preheated oven for 30 minutes.

The cookies are really soft on the inside and to be honest are more like the consistency of cake! I spread Meridian peanut butter on mine this morning and it went down a treat!

The One-Pot Wonder

imageimage

This spicy veggie sauce is one of the most versatile things you can make in batch form.  I usually make a big batch of this on a Sunday evening and mix it into pasta to take to work for lunches throughout the week, but there are so many other pairing possibilities! We have used this sauce as a fresh salsa dip and can even be used to cook fish in (or chicken if you prefer). It can be used as a base sauce for lasagne or even on its own as a Ratatouille. It can also be added to wraps or fajitas. The sauce freezes well and will last up to five days in the fridge.

Recipe for 6-8 portions (as a pasta sauce)

  • 1 tbsp olive oil
  • 2 tins of chopped tomatoes
  • 3 tomatoes quartered
  • 3 cloves of garlic
  • 1 onion
  • 1 pepper
  • 3 courgettes
  • 2-3 chillies (optional and to taste)
  • basil
  • salt and pepper
  • dash of red wine
  • 1 tbsp on fruit sugar

Sauté all of the veggies with the garlic and olive oil until they have softened. Add the chopped tomatoes, red wine and basil. Simmer for 15 minutes. Leave to cool before freezing.

The great thing about this sauce is that you can customise it to your liking – why not add extra veggies such as mushrooms or aubergine or crank up the heat if you like it really hot.  It’s a great way to use up vegetables which may have otherwise been wasted and with only one pot to clean it really is a winner 😉


Sourced Box Subscription 

imageimageimage

I had been humming and harring about whether to subscribe to the Sourced Box service for a couple of months as I wasn’t sure it would be worth the money but I did really like the idea of having some tasty treats delivered to work each month. I’m really pleased I gave Sourced Box a go! The snacks included are seriously delicious, not to mention all natural and refined sugar free.

Sourced Box contains ten to eleven snacks, from dark chocolate to vegetable crisps. The contents of the box changes each month so you never know what you are going get- a nice surprise! As you can see from the picture above, there is a good variety and I liked everything included in my first months box, in particular the Rude Health Beetroot bar.

There are three options available to you when you visit the Sourced Box website.

  • a one-off box £21.95
  • a monthly subscription £18.95
  • a yearly subscription £189.95

I chose the monthly subscription but it is worth bearing in mind that if you chose the yearly subscription option you are getting two boxes for free. Sourced Box allows you to cancel your subscription at any time. I have been really impressed with the service I have received so far; I had quick responses to a couple of emails I had sent and the box arrived ahead of schedule.

It can be hard to find healthy snacks on the go which are free from unnecessary chemicals and sugar, so for me this service is a real game changer. I did sign up to this with the intention of making the box last me a good few weeks but in reality it lasted me 5 working days (oops!).


Dark Chocolate Treats (refined sugar-free!)

These dark chocolate treats are so delicious and perfect to serve with coffee after a dinner party with friends or simply to satisfy chocolate cravings! If you don’t like intense dark chocolate then this recipe isn’t for you, but if you like the bitter taste of dark chocolate and are comforted by the fact that just ONE of these bad boys will be enough then this will be your jam.

The best thing about these chocolates is that they are refined sugar-free and contain coconut oil which is known to help burn fat. Yes, that’s right. Burn fat while you are eating chocolate – does it get any better?

To make 6 ice cube sized chocolates, you will need.

  • 1/2 cup of Coconut Oil
  • 1/2 cup of Cocao Powder
  • 1 tsp of pure Vanilla Extract
  • 1/4 cup of sweetener of your choice i.e. Maple Syrup or raw Honey.
  • pinch of Salt

NB: toppings are optional, I put one almond on each chocolate but the possibilities are endless. I think dried cherries would be amazing paired with the dark chocolate. Instead of using toppings you could always add these into the mixture before chilling.

To make the chocolates simply melt the coconut oil for a few seconds in the microwave and then mix in the rest of the ingredients. The consistency will be like a thin chocolate sauce. Carefully pour the mixture into ice cube trays and place in the fridge for an hour. After an hour the mixture will have set and turned into chocolate! Push out the chocolates as you would ice cubes. If using toppings stick these on using a tiny bit of honey or maple syrup.

These chocolates will keep in an air tight container for quite a few weeks, although I don’t think you will need to worry about that!

image

Feel Good Recipes #SweetToothEdition

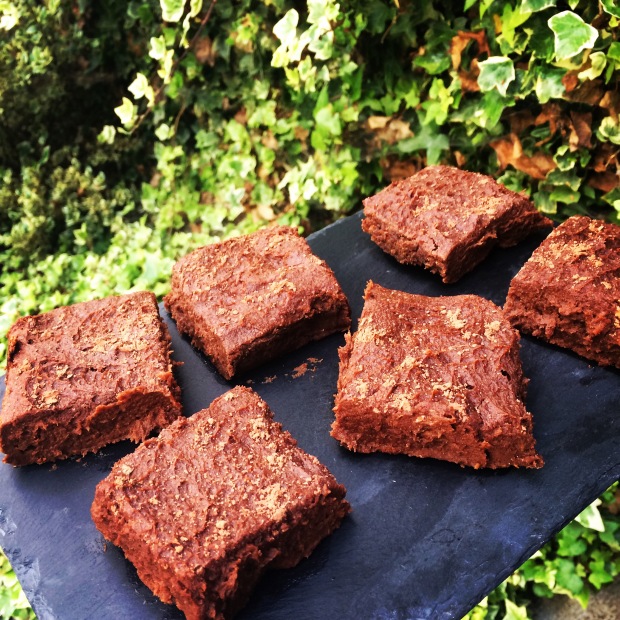
Banana Bread – Cookie and Kate Recipe

I have mentioned before that I have a major sweet tooth, especially in the morning. I have to stop myself from going into Marks and Spencers every morning to get a Pain au Chocolat, now its strictly a Friday treat (ahem). So I was looking for something to satisify my breakfast cravings which wasn’t going to make my sugar levels suddenly crash at 10am. I thought a healthy Banana bread might be the answer and came across Cookie and Kate’s recipe.  Theres no refined sugar in this recipe, only honey. The recipe states that you can use coconut oil or extra virgin olive oil instead of butter. I used the olive oil option as that was all I had in the house. The olive oil and bananas keep the bread extremely moist and this is the type of bread which gets better after a couple of days as the bananas ripen further. I added chopped walnuts which go perfectly in banana bread but I think some dark chocoalte chips would be amazing in this recipe! So if you’re looking for a moist, healthy sweet treat on a morning, why not try Cookie & Kates receipe?
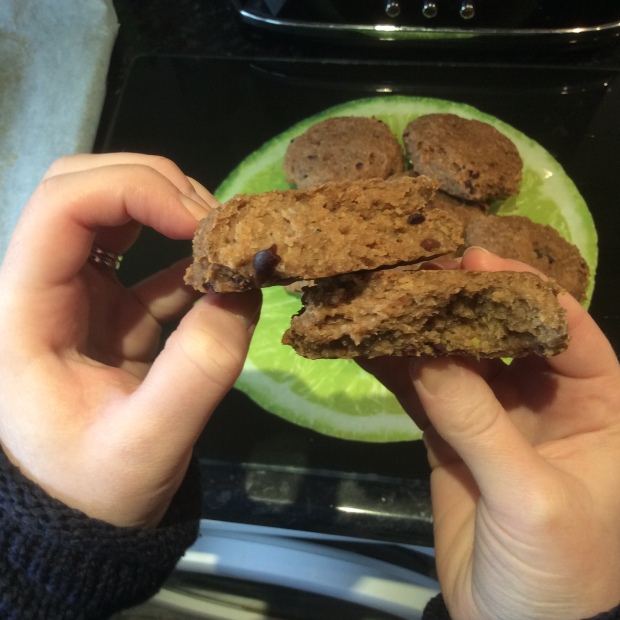
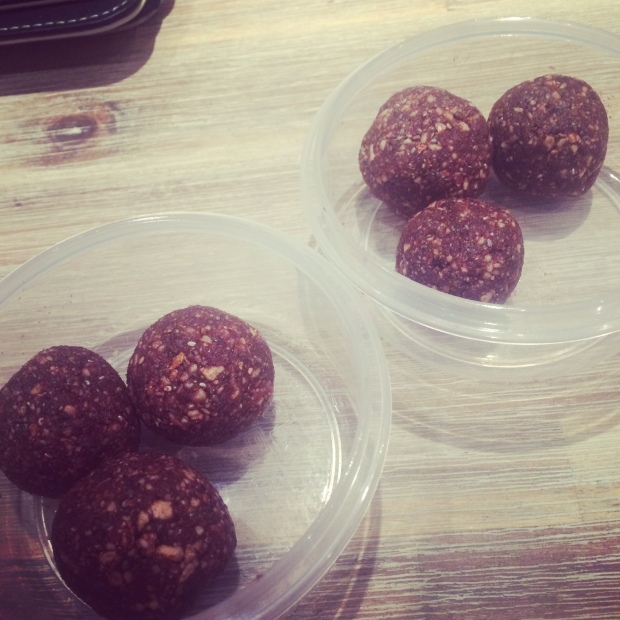
Date Energy Balls

I’ve recently purchased the Magimix 3200XL Food processor and because of the price, I was hoping it will be a good investment – so far so good! Before it arrived I did my research and came across some healthy snack ideas which I could whizz up when it arrived. I liked the idea of the ‘energy balls’ I had seen so much of Instagram and YouTube but I was a little put off by all the coconut oil and maple syrup which were being used. I really didn’t think they were needed due to the sticky, sweet nature of the date.

When the Magimix arrived I thought I would create my own take on energy balls and I am happy to say they were a success! With only 3 ingredients to chuck in and go – you can’t go wrong really. With this kind of recipe I really don’t think you need to follow strict measurements as its not being baked. It’s just a case of checking you have the right consistency to roll the mixture into balls. If too dry, add another date or a little water. If too wet add a few more nuts or some more Cocao powder – I use this one. As a guide I roughly used the following to make around 8 balls.

4 Medjool Dates

50g Almonds (or any nut you prefer)

1 tbsp Cocao

Once whizzed up to the right consistancy and rolled into balls you can then roll them into some chopped hazelnuts, chia seeds or anything that takes your fancy!

I took three of these balls to work for my breakfast and found that they kept me full until lunchtime. They are great to use as a snack and they keep for up to a week in the fridge.

image

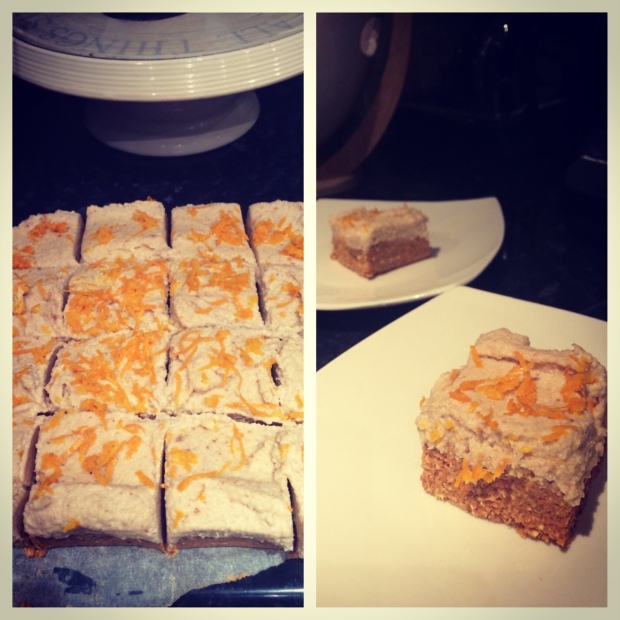
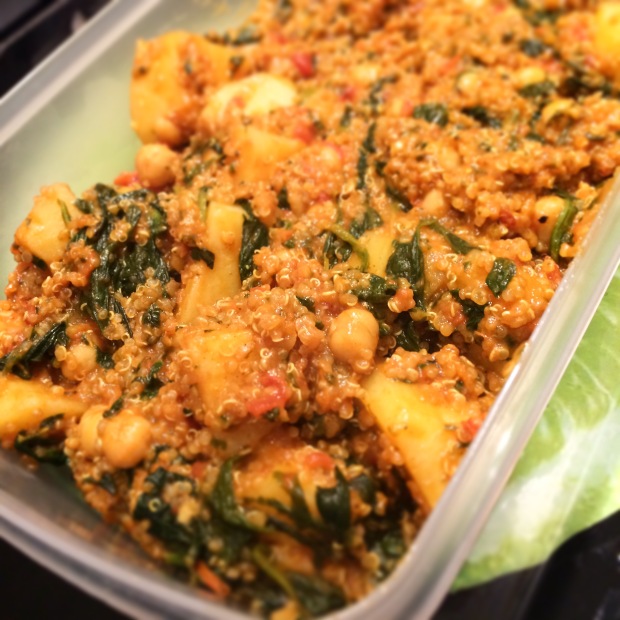
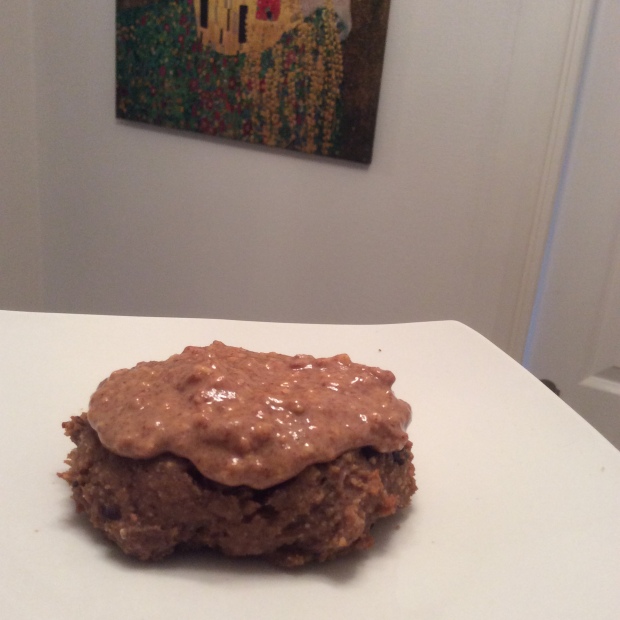
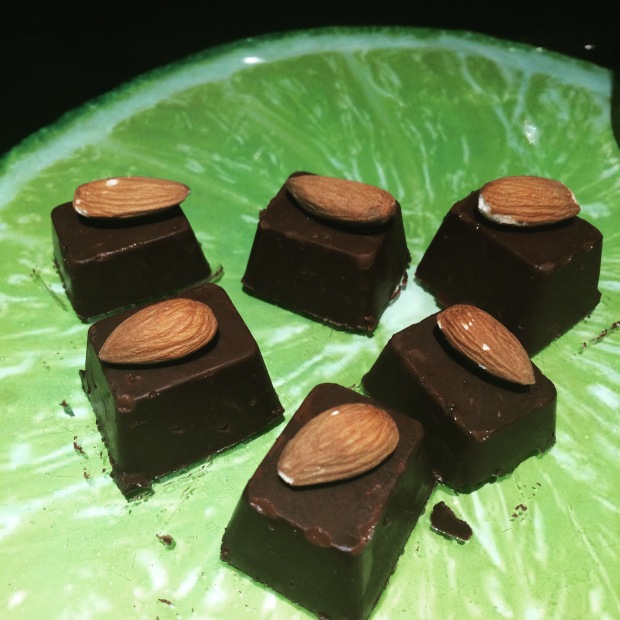
Raw Carrot Cake – by Lorraine Pascale

I love me some carrot cake, it must be my favourite type of cake! And you guessed it, I was looking for a healthy alternative. This recipe by Lorraine Pascale happens to be raw, vegan and gluten free which is great for those with intolerances or perhaps you just prefer to eat this way. As this is a raw cake there is no baking involved and all the ingredients can be whizzed up in a food processor. The icing is made from soaked cashews, dates and vanilla extract and I was amazed at how good this tasted! I think this icing would be a great, refined sugar-free addition to lots of different types of cakes and desserts.

Lorraine this recipe is genius!

image